Showing posts with label owl. Show all posts

Wednesday, October 28, 2015

Stuffed Owl Pillows

Adorable Baby Owl Pillows
!Owl Tell You Sew!

Today will be my first tutorial in celebration of my cuz-babes birthday! She will be turning 1! Can you believe it? Where does the time go? She is absolutely adorable and loves everything girly and pink. I wanted to make something special to give to her so that she can fall in love with animals and have it be something she will recognize as LOVE and COMFORT. It isn't just any stuffed animal!
I found this pillow while searching for owls on etsy! It was sew cute, I just had to make one! It's really simple and FUN! I busted out all my favorite scraps and fabrics. Lace, ribbons, buttons, minky, ruffles and sparkle! The eyes are actually from my MIL, she keeps them from her shoe boxes that come with the flower packaging. Awesome!
 
Poor thing needs a beak! 

To start, grab some scraps laying around...download the Owl Template from 'the eternal thread' 
She does a really great tutorial with step by step pictures. 
You will need:
Fusible Interface
Heat n Bond
Scissors
Sewing Machine
Stuffing

Start by tracing the owl template for both the front and back of your owl. 
This will be my front fabric. Do the same for back fabric. I have used minky and flannel with no problems. Anything you want!
Iron on Interface to the front owl (and back). I only do the front side...but I think it's too stiff so I leave it out. 
Cut out wings and decorate them! I sometimes add a blanket stitch around or hand embroidery. Buttons, ric rac, lace, textured fabrics, etc. Have fun with it! 

It took me awhile to decide on the front. I recently figured out a way to make Ruffles using embroidery floss. Have you tried this??? It's awesome and really easy. You basically just zigzag stitch on either side of the embroidery floss and the ruffle will gather when it slides along the floss. After about 5 ruffle strips along the front of my owl, it's time to work on the eyes!
 
Tip: Draw a line using invisible or wash-away pencil where the wings will be placed on the front of the owl. 

For the eyes, I used felt and cut around the edge to make a feathery eye pocket. I used heat and bond to hold in place and sewed a circle in the center. This will just solidify the eyes. Instead of the sparkly flowers, I went with more of a "retro" inspired look. These are crocheted sunbursts from an old, unfinished project. 

I added buttons to keep the eyes in place. Don't forget to add the beak!
 
Add the wings on each side. You can hand stitch, blanket stitch or straight stitch! I appliqué the hexagon on the left with a blanket stitch. The right has a few green buttons...I wish I added more? You can add ear tufts or feet at this time too! I used orange ribbon and sewed tiny feet in place before adding the owl back. 
 
With the cute owl facing you...add the owl back (right sides together) and sew around the owl leaving a three inch opening for turning. I usually leave the opening at the bottom. Make sure you add a few pins to secure the back in place. 
Trim excess fabric and cut ear corners. 
Turn the owl inside out....and press.
Now time to stuff!! Stuff the little guy! Keep stuffing...I used polyfill craft stuffing. Sew the opening closed with a blind stitch. TA DA! Isn't he cute? I think I know exactly whooooo this is going to !
What do you think his name should be?

I'm just obsessed with owls! They are sew cute together ;)
These owl pillows would make a great gift for new Moms and kids whoo love stuffed animals; or to use as decoration! The possibilities are endless....just have fun with it.
Hope you Love them as much I DO <3

Laura

Monday, October 19, 2015

Owl Blocks

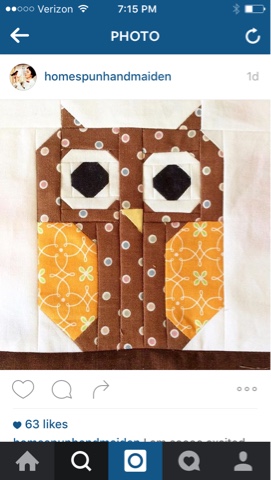
As soon as I saw this picture on instagram, I just had to make one! Plus I am totally obsessed with all-things-owls so it wasn't hard to purchase this pattern from @Homespunhandmaiden for only $1.99! Try making one yourself. It's sew much fun and very easy to put together too. 
I couldn't wait to get started! So I picked out some left over tiger lily fabric from a recent quilt. It is brown with green, yellow and orange flowers. It reminds me of Fall! I have a 12 x 12 pillow form and decided it would look great as a mini pillow for my living room. 
I cut all the squares and rectangles out, which only took me an hour...I hate cutting fabric! This would be a lot easier if you could use scraps. 
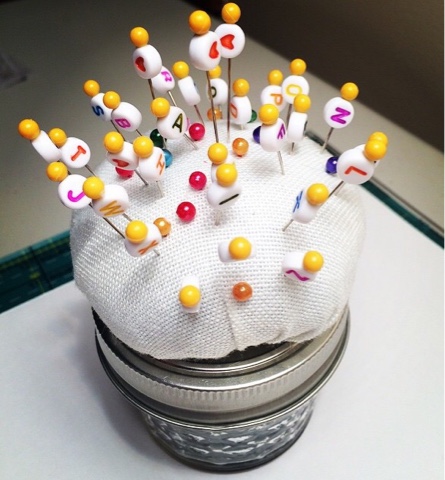
These alphabities are a must! If you don't have any, you should make some or use paper and pencil. It makes the steps go by faster and helps stay organized. Before I purchased alphabities this is what I used... 
Super simple! Right?
Back to the sewing machine!
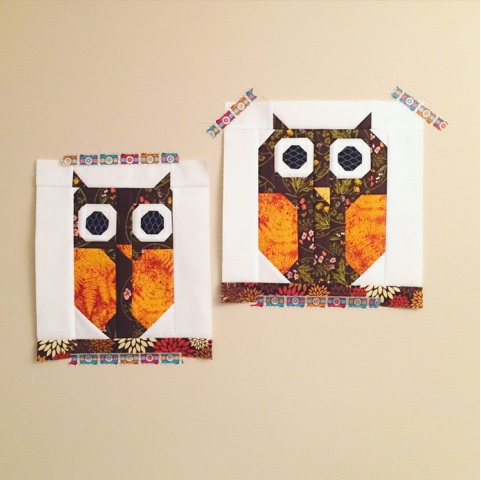
I started to make the eyes, body, ears, beak...and continued until the block was complete! The reason there are two owls is because the pattern was wrong, but after seeing the two together they are pretty cute!!
I was able to quilt, and use the larger owl for the 12 x 12 pillow form. I absolutely love how it turned out. Whoooo wants it?

Thanks and Have a nice Monday!
-Laura

Monday, October 12, 2015

Great Granny Pillow


This Great Granny Square pillow will be a gift for a friend and new Mom! I'm sure she is super excited and I can't wait to meet the little one myself. Awe! Babies are just sew cute :) 
Before I attempted to make this pillow I asked what her nursery theme was going to be. She said an animal theme, focused on Magenta and Teal as her main colors. Perfect! 
This was the picture she shared. Isn't it adorable? I couldn't wait to get started!
This pattern is from Lori Holt's book, Great Granny Squared. She makes the most amazing quilts and I love how this pattern incorporates a crochet pattern. I only had scraps from a quilt panel (to match) so I decided to make more of a scrappy pillow, instead of a perfect color granny square. The possibilities are endless! 
After this point, I ran to the local craft store and bought a 20 1/2 inch omni grid ruler to square up. I wasn't very confident in squaring up myself. Rulers are awesome! What do you think? This is without the quilting and borders...it is really BIG! Bigger than what I had expected, but would look great on a rocking chair or next to a stuffed animal. I ordered a pillow cover that was 26 x 25 for a fuller look. It suggests doing a few inches larger than pillow case. The back is an envelope cover with half magenta minky dot fabric.
I love the scrappy binding! It was supposed to go on the quilt, but I like it better on the pillow. I must admit, I love making pillows now! And will continue to try different colors and patterns. I will show the matching quilt once it is finished. Thank you for stopping by! 

-LMK