
I received a few of these coasters recently and love using them when we have guests over. On NYE, we were using our French wine glasses and kept getting them confused with each others' glasses. Mine usually have a lipstick mark and is filled with Chardonnay, but why not make it easier for everyone! Problem solved. Slip these little guys under the bottom, and you have the perfect glass identifier! How Cool!?
I heard they were very simple to make and super fast! You can whip these up in minutes. Stuff like that always amazes me. So, I googled folded coasters and this tutorial popped up. She does such a good job explaining the steps (not like it's hard) and has helpful pictures too.
I found this charm pack that was on clearance for $3.00. I used a coupon and it ended up being half-off. Sew I bought two! They each come with 30, 5x5 inch squares. This will make exactly six coasters. Perfect! Let's get started.

Grab 5 different charms. One charm square will be your backing, and the other four will make the top. You can use batting in between to make it thicker, only if you want.
First, lay a piece of batting down, with the charm square right side up on top (purple). This will be the back of the coaster.

Fold the other charm squares in half and press. Lay the first folded charm along the side. (green)
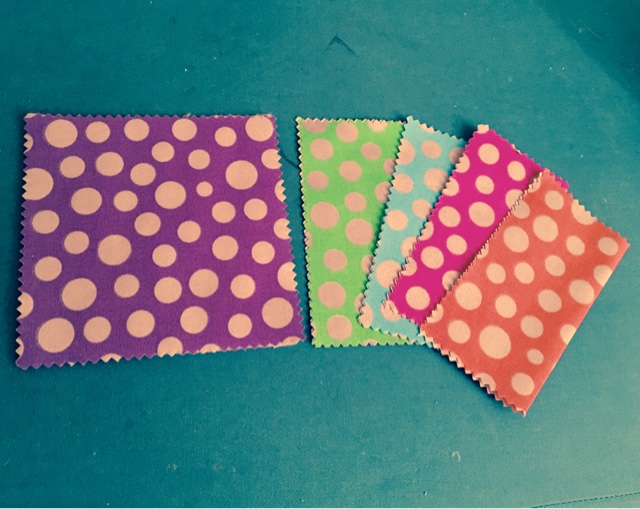
Make sure the salvage edge is along the outside, keep the folded edge on the inside. Lay the next half on the other edge. (blue)

Green, blue, pink, orange! When you get to the fourth charm, you want to tuck it under the first (green) fold. It should end up showing all four colors...in the order you placed them.

Pin or use clover clips to hold in place. These little guys love to slide around! Once it is pinned in place, take it to the sewing machine and sew around the edge using a 1/4-1/2 inch seam allowance.

Trim the corners and clean up the edges. Now is the fun part!! Flip this little guy inside-out. I use a crochet hook to push out the corners. Then, use the iron for a final press.

Front and back, all finished in bright colors and fun polka dots! Ta-Da! Doesn't that look great? I know a few people that would love this for their bar, outdoor patio, kitchen table, boat, etc...
Like I said before, 30 of these charm squares make exactly six coasters. The best part about buying pre-cuts is that they already match, and are cut to perfect 5x5 squares. Boom! Whooooo can stop at making just six?

Before I started making these, I like to look online at pictures of what everyone else has made. It usually sparks inspiration and makes me want to do it even MORE! I'm addicted, what can I say? I happened to find this picture on Instagram.
What does it make you want to do?

This set of coasters is sew awesome! I love the rainbow, the circle of colors, it's very mesmerizing. Wouldn't those be perfect next to the pool on a hot summer day? Listening to gangster rap...I hope! Drinking Chardonnay. Yaaaas!
So next time you're at the fabric store, grab some charm squares and
get to your sewing machine! You can make these in a variety of colors,
themes, and even shapes. I heard you can use hexagon precuts to make
hexagon coasters. I love hexagons! I will have to try those next time, till then...Check out this YouTube video "How to Do Hexagon Coasters"
* I gifted this set of coasters to our good friends mom, Mrs. G! One summer day, we took their boat out, and we're having a couple glasses of chardonnay with these adorable wine glasses she bought from Target...I was apprehensive in the first place trusting me with my wild mantis arms. Long story short, my mantis arms knocked the wine glass off the boat and into the lake! We circled around looking for it (it was supposed to float), but couldn't find it anywhere! I felt horrible, and haven't been invited back since! Haha...I know she will love them, and they even match her patio furniture. :)
Thanks for stopping by,
Laura
I love your colorful coasters! They are so pretty! And thanks so much for your kind words about my tutorial. I've had the pattern for many years, which I picked up at a guild meeting. It was handwritten with hand-drawn pictures and not very clear. So I wrote the blog tutorial to share with others and make the instructions easier to follow. I am glad it was helpful!
ReplyDelete