Thursday, May 18, 2017

Sewing Early


 Falling in Love With Sewing at an Early Age
Childhood hobbies can be easy come and easy go. Do you have memories of a childhood hobby which you started with oodles of enthusiasm? One that dwindled into a sad declaration of “I don’t want to do it anymore!”
“Tough! You’re sticking with it,” may have been your mum’s response as she eyed your new guitar or violin or whatever the tools were of your fading hobby.
Then there are those that stick and bloom. Sewing is one that sticks for many, the one which children fall in love with.

Starting Gently
If your kids show an interest, teaching them to sew is a great opportunity to bond with them, to make fun and beautiful stuff, and create some amazing family memories.
Many parents wonder how young is too young to put a kid in front of a sewing machine. Some kids start as young as 4 years old; it all depends on your child. A good rule of thumb is, if they’re interested, encourage them and teach them to do what they can learn at a young age and with your supervision. Certainly, a six-year-old is ready to learn.
Will they stick with it? You don’t want to buy all this sewing stuff to put in storage. The best approach is to encourage their interest in sewing gently with the right tools and fun projects.

Little tools for small hands
Don’t get a toy sewing machine for a kid who wants to learn how to sew. This sends a message that they’re just playing at sewing and their interest is not serious. Instead, go shopping and pick out a kids’ sewing machine together. They can look at the style and colours while you figure out features like speed control and automatic needle threaders, which are important for a kid who’s just getting started. 

No, it’s not a girl thing
Sewing is great fun for both girls and boys. If your son shows an interest in sewing, rest assured that it’s a very suitable skill for a boy. Think of Ralph Lauren and Tommy Hilfiger. Sewing with kids doesn’t have to be all frills. There are some great boy things to make, such as hand puppets, which are great for family fun times.  

What shall we make now mum?
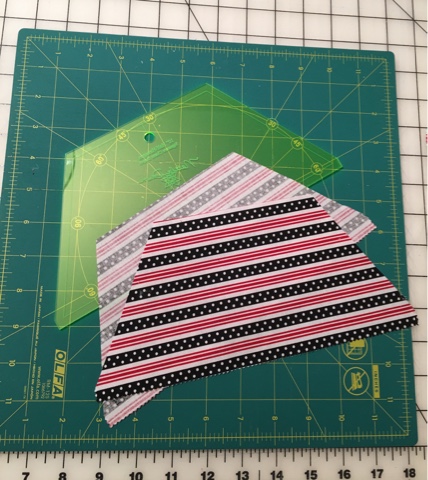
The kinds of projects you pick together will be the key to continued interest. For younger kids, pick things that they can make fairly fast. Stuff they can make for themselves is a great place to start. Look for bright colourful projects to make like headbands for girls and belts for boys.
Don’t let your kids interest in sewing fade away. Not every kid who learns how to sew is a fashion designer in the making, though you just never know! But even if it’s just a passing fad, it’s one they will never forget.

Guest Blog written by: Sally Perkins

Tuesday, July 5, 2016

Summer Sale

Welcome Summer! I love this time of year, it's way better than those long, winter months. I like to spend a lot of time outside gardening, riding my bike, sun-tanning, and drinking Chardonnay by the pool! :) I usually spend my nights crocheting baby outfits. It gives me something to do while my husband watches sports or when I need to unwind before bed. It has been one of my favorite hobbies for a long time.

I recently added new listings to my Etsy store! Not only do I have adorable toddler rompers available, but I've been working on newborn sizes too! They are so sweet. I really love having the shorts too! Sometimes it can be tough changing diapers and messing with all those buttons! But my new patterns are easy and comfortable...Adjustable halter-top and short shorts can be worn with tights and matching headband, or alone with sandals!

I can add any embellishment to the front. Look how cute the new "daisy collection" turned out!


Each romper is unique and made with lots of love! Attached on the front of the bib is a bright contrasting flower or tiny daisy. It's hard to pick just one! If you love to crochet (like me), and are up for something new, check out this awesome flower tutorial by annaluciadesign.com! Once you get the hang of it, it is fun and simple. She includes complete step by step instructions and photos on the site. If you want to make one of these crochet flowers, check it out here!


Currently, these rainbow bright colors are perfect for the summer. Use code: RAINBOW for 40% off all listings until the end of July. If you have had your eye on one of these adorable baby outfits now is the time to buy!


Go to my Etsy shop: OwlTellYouSew to see what's new! Plus, don't forget to use the code for 40% off all listings! That's the best deal of the year! These would be perfect as a shower gift for a new mom or newborn photography. 


If you decide to purchase one of these precious rompers, please leave a review! And I would love to see a picture of your baby wearing one too. Tag me on Instagram @owltellyousew or send an e-mail to owltellyousew@gmail.com - It's up to you if you decide to share, no pressure.


I have been receiving a ton of inquires regarding these romper patterns. Unfortunately, I do not sell patterns, nor have I ever written one before. I would love to be able to make a few different patterns and eventually add them to my store. In the meantime, stay tuned for future updates and listings!


Thanks!
-LK


Wednesday, June 15, 2016

Baby Gift Baskets!

There is something about a tiny, gray, chubby, baby elephant that always gets me! It has been baby season around here lately, and I haven't had a chance to catch up on my blog posts. I have been working on my handmade items for family, friends and customers online. It has been a busy year to say the least! I can't complain however, I like to stay busy. I would like to share what I have been up to for OwlTellYouSew!


I always like to have a "theme" in mind when creating something for someone. Especially for special occasions like baby showers and birthdays. I have been making, Baby Gift Baskets!!! 
My entire brand is surrounded by baby-themed clothing and decor. I have some pretty good ideas on how you can make something special with just a little time. Here is what you need:

Baby Basket-
This is what you are going to put your gift in. The best part about giving someone a basket is because they can continue to use it for storage in the baby's nursery. If you know the color, find something that matches, or just a natural woven basket will do. Maybe with handles? For a special added touch, use the shower invite as a gift tag! 


Stuffed Animal-
Everyone loves stuffed animals! And there are so many cute ones out there just waiting for the perfect home...You can find a stuffed animal almost anywhere. But stick to your "theme!" Go on a hunt for that perfect pink Boho elephant! I've seen so many amazing handmade dolls and animals on Instagram! Here are a few of my all time Favorites!!!


You can have fun here without having to spend a fortune. It will make a nice addition for both the baby and the gift basket! If you do decide on ordering a handmade doll/animal, make sure you give at least 6 weeks for it to be made. It takes time people!! 

Clothing & Accessories-
This is where I like to hand-make a romper that matches my theme. Either pink, purple or rose! I have been making mostly girl-stuff lately. Girl Power!! Find a cute onesie, dress, bib, robe, shoes, headband, bracelet, etc!! If you see that adorable, irresistible, OWL faced pillow and it matches your "theme" then by all means...go for it! It will be the sweetest present EVER. Just remember to stick to your theme and have fun!


Blankets/Nursery Decor-
Handmade items are wonderful, and will make a lasting impact on any newborn! But if you aren't that crafty and still want to impress, just grab something from the baby shop. There are so many soft and cuddly blankets, nursing covers, changing pad covers, sheets, bedding, pillows, bumpers, etc... If you have a blanket, I like to roll it and tie with a matching ribbon. If you decide to wrap your gift, add a special touch with fake/felt flowers. Use a baby headband as gift wrap! I have a thing for pillows. I made both the owl and wooly sheep pillows. Aren't they just adorable?!

So next time you are invited to a baby shower or birthday try this gift idea! Remember to stick to the theme--be creative, add special touches, and take time in finding that perfect item. 

I am excited to announce I am an Aunt again!! On May 31st, my baby niece was born! We are thrilled. She is absolutely beautiful and has brought the family so much love! I can't wait to spoil her! I am lucky to have so many cute, little el ninos in my life.

Thanks for checking out my page! If you are interested in purchasing a handmade romper, you can find them listed on my Etsy Store - - - - - OwlTellYouSew

XO
Laura 

Wednesday, March 9, 2016

Bunny Bag

Hello Spring!

Finally, it feels like it has been soo long since we last met! I have missed the green colors, sweet smells, birds chirping, shining sun and critters all coming outside to play. It's my favorite time of year. A new beginning, a time to start fresh with new ideas and lessons. With spring, comes Easter! And with this absolutely adorable bunny bag tutorial from Tied With a Ribbon - I just couldn't wait to make one. I recently bought a bunch of chocolate candy eggs and needed a bunny bag to put them in. Awe, wouldn't this be sew cute for a birthday party or Easter gift bag? I guess I have to make one for my nephews and niece! 


What you will need:

White/Linen Fabric
Inside Lining Fabric
Bunny Face Fabric
Bias Tape maker
Thread
Fusible heat n bond 
1.5"x5.5" top border
2"x16" for bias tape

Most of the fabric I used came from scraps and a charm square I've been hoarding to use as the bunny face. The aqua fabric with the little cherries is amazing?! It was love at first sight, it's called Bandana by moda. 

Use the template to cut the fabric pieces. You will need two outside and two lining pieces. The lining is longer than the outside because you will add a top border. 


Using the bunny face template, trace it onto fusible heat and bond. Following the manufacturers instructions...bond the fusible to the fabric and cut out the bunny face when it has completely cooled. Get ready to fuse the bunny face onto the front of the bag. *For future bunny bags, I would place my bunny face a little lower on the bag. Make sure you have enough space at the top to tie.


Once the bunny face is fused to the front of the bag. Use your favorite applique stitch to secure the bunny face to the front. I used what's called a triple stitch all the way around. This was the first time I have ever tried it! It makes a solid stitch by going back and forth three times on each stitch. Pretty cool, especially since I never knew about it! See, you CAN learn something new everyday!


Now take your 1.5 x 5.5 strips of fabric and sew them to the top of each piece of outside fabric. Your bag should look similar to the picture below. Press the seams open, and move on to the next part.


Now we will want to make bias tape to use as the tie closure. Before you panic, this is actually fun and easy. If you want to learn more about bias tape check out this YouTube video! It's a great tutorial and very easy to follow. This should prepare you for what's next...I have never done this before either, and if I can do it, sew can YOU! I have 25mm (1 inch) bias tape maker. I cut my fabric strip 2x16 and slid the strip into the bias tape maker. It folds the fabric in half for you! Press as you pull the fabric through.


Fold the tape in half again, this will make the bias tape and without any nasty seams showing. Sew exciting! I think after this project I am going on a bias tape binge making roll. You can always use it for something? Once it's folded, sew down the edge and along the bottom. Tie a knot on each end. 


Take your pretty, finished bias tape tie and pin it about an inch below the border. I would do a little less than an inch. Sew the tie in place. 


Now take your lining pieces and attach them to the top of your bag pieces.
Press the seams open. Your bag should look something like the picture below.


Lay the bag pieces on top of each other (right sides together). Make sure to pin the ties out of the way, you don't want to sew them on accident! Leave an opening in the lining so you can turn the bag inside out. 


Sew around the bag using a 1/4" seam allowance. Watch out for the tie! And leave an opening. Once it's all sewn, flip inside out and press so it looks pretty. Sew the open space in the lining closed. 
You can top-stitch around the bag for a professional look. 


After this one is done, on to the next bunny bag! What do you think? Thank you to Jemima over at Tied with a Ribbon for the tutorial and inspiration. Be sure to check out her blog for more fun Easter craft ideas. I hope you give it a try with your favorite colors and fabrics!

HOPPY SPRING SEASON!


XO
Laura


Sunday, March 6, 2016

Spring Sale!


Spring is my favorite season! Mostly because I was born in the spring (April), and the thought of warm weather, flowers and baby animals gets me super Happy! Celebrating Easter with family traditions, egg decorating, and candy is the best. I love stale peeps, its odd, I know...but the hard sugar and processed marshmallows (once a year) really makes all the difference. It wouldn't be Easter without them! *My mom would always make sure to include a fresh toothbrush in every basket. Thanks Mom!

What do you look forward to getting every year in your Easter Basket?
 
Spring Sale is going on NOW until March 20th! Get these handmade items while they last. It would make the perfect Shower Gift, Easter Outfit, or Spring Photos. All of these items are handmade with love and pride. I put all of my time into making these baby outfits, and hope you enjoy them as much as I do. I wouldn't sell them if I didn't think they would be kept for generations to come...


With Spring right around the corner, I can't wait to share my first SALE! If you have been eyeing these little rompers for awhile now...this sale won't last long, and now is the time. I will be adding new items soon that you won't wanna miss. Until then, enjoy 20% off all orders using code SPRING20 on my Etsy store, OwlTellYouSew

Thank you for stopping by, and stick around for more exciting things to come!

Thursday, February 25, 2016

Sashed Half Hexagon Quilt


Quilting tutorials are always fun to watch. I always wonder if I could make a quilt, and how long it would take? As a beginner quilter, it's kinda hard not to see or hear of the Missouri Star Quilting Company. Jenny Doan started long-arm quilting in 2008, and since then has dominated the World Wide Web, YouTube Channels, and even has her own Factory Store! Pretty impressive. As soon as I downloaded the MSQC app on my iPhone, it has opened new doors for me, as well as other quilters! She has the best video tutorials that are super easy to follow, comprehend, and execute. I have made a couple other quilts in the past, but this one is different. This one...is going to be ALL MINE! Bwhahaha!

Instead of a doing a tutorial (which you can find here) I wanted to share with you the fabric, design and overall excitement of this sashed half-hexagon quilt. Here is what you need to get started!


I love the look of this quilt. It is a perfect mix between a friendship braid and half-hexi twist. Sew cool! It even looks like a stained glass window. Jenny, of MSQC chose a black sashing inbetween her hexagons and I think it really makes this pattern POP. However, the best part about quilting is you can make any quilt YOURS! Same pattern, but different fabrics, colors, border, sashing, etc..That is what makes quilting fun. 😀

What you will need before you start:
10" Fabric Squares (Layer Cake) - I am using Retro Floral by Michael Miller. I'm really diggin' the red and turquoise colors, very vintage chic!
10" Half-Hexi Template for cutting.
1.5" Sashing (any color) - I am using white sashing.
Rotating Rotary Mat is crucial when cutting those Layer Cakes.


Let's start by cutting all of the 10" squares into Half-Hexagons! To do sew, fold the layer cake in half, and lay your half-hexagon template with the salvage edge along the bottom. Use the half-hexagon template to cut each piece of fabric. Once these are completed, sit back and look at all the hard work you just did! Way to go! I think cutting is the hardest part - good thing we got that out of the way!


Now it is time to add the sashing to each half-hexagon. I used a roll of white, 1.5" sashing. Line the half-hexagons onto the sashing, and sew using a 1/4" seam allowance. I was able to get three half-hexagons on each piece of sashing. Make sure to leave at least an inch in between each one. When you cut the sashing, you want to have enough space for each one. Once all of the half-hexagons are sashed, it is time to press and cut.


Using the edge of the Half-Hexagon template. Line it up and cut each one. This will add a nice border to each half hexagon. Now for the fun part!


Have you ever tried to make a friendship braid? Not only in quilting, but embroidery thread bracelets too? When I was in third grade, and active in Girl Scouts® I was always making my friends friendship bracelets. We used to collect friendship bracelets, the more you hand, the more friends you had too! We were obsessed. Even back then, my friends would get jealous that I knew how to make them and they didn't? I guess that was before YouTube videos....and I had a couple older sisters that taught me everything I knew (back then). Except for pig-latin which they would use against me to talk about the boys at school. In hopes, that I wouldn't tell my parents! Haha. They looked sew cool! It has to be my all-time favorite pattern. As soon as I saw this tutorial, I already knew exactly what I wanted to make. It has been added recently and I'm thrilled about it! Thank You MSQC!

Ok, sew you want to grab six half-hexies to make one block. Make sure these six blocks are all mismatched and different colors. It makes for a more interesting quilt. Start by adding the side of a hexagon to the bottom of the other hexagon. * Watch the YouTube tutorial for a better understanding. Once you start, it becomes easier to add each one...creating this braid until you have added all six half hexagons. 


Now we are going to square-up our blocks. Ewww....not very exciting. Mine were squared to 12.5 x 12.5 inch blocks. Ta Da! You will have some scraps left over, don't worry!


You will need 12 blocks altogether. 4 rows of 3 columns. Make sure the iron is HOT - you are going to need to press these babies for awhile. Also, play around with the layout. Using your quilt wall or floor, work these blocks in different directions and patterns. You don't want the rows to look alike. Mix it UP!


Obviously you want to play around with all of the blocks until you are satisfied and ready for the next step. You will want to add sashing strips in between each block and along the bottom to add some dimension. Start with the first row of three, and work in rows until you are done. Then, sew each row together with sashing in between.

Eventually you will want to add an additional border, batting, and binding to this beauty. Check out my 'Recent Projects' page for updated picture when this is completed. Soon Hopefully!


Sew Pretty! Hope you enjoyed these pictures and preview of what's to come.
Thank You

LMK


Monday, February 22, 2016

Now Open

Come one, Come ALL!

I am happy to announce my new Etsy store, "OwlTellYouSew" is now OPEN! 
I am super excited to share with all of you what I have been working on.


This has been a very long time coming, and I couldn't be happier with the outcome (sew far). It has been all around exciting and super hectic at the same time. I recently started writing this blog in October, and trying to learn more about social media, advertising, followers, etc...It has been a challenge to say the least. After many long hours...now is now!

I would like to encourage all of those whooooo are reading to submit any feedback! I am still learning, and would appreciate any and all forms of advice. I have a game plan going forward, but I am going to need the support from friends and family! Wanna know how you can help?

-My GOALS-

1. Blogger Attention

My blog is fairly new, and sometimes I wonder if its worth it? Whoooo Cares? But then I remember how much I love to make and create things! I am seriously obsessed. By having this blog, allows me to share my creative spirit, and show those whoooo might not care, that its fun and easy! I have been inspired by many of those who have been doing the same thing for a long-ass time. What keeps them going? These people are amazing artists, mothers, quilters, athletes, foodies, wine-drinkers, whatever it is...they are really good at what they do. That being said...Do what you LOVE!


It would be my honor to be mentioned in some of these bloggers posts! They have a huge, loyal following and can keep their followers coming back for more. Wow. Below are a few links to my all-time favorite bloggers! Whoooooo knows, you might find something you like?

A Bee in My Bonnet 
3and3quarters
VintageGrey Handmade
Cluckclucksew
SeekateSew

2. Local Shops

The minute I launched my Etsy store, I thought items would be flying off the shelves! Haha, was I wrong! You need to put in the long hours, hard work, and personal face-to-face time and effort. As a business entrepreneur, I know how important it is to actually see, touch, hold, and try on these items. You don't always get what you want, or get what you see necessarily? It is difficult to express the LOVE in handmade items through pictures. It just isn't the same. Kinda like dating sites? Which brings me to my next goal. Providing local shops with my baby clothing. I have noticed that more pop-up stores are coming to my area that are encouraging handcrafted goods and homemade items from locals to sell. Yaaas! I can't wait. For the next few months, all of the crochet baby rompers will be sold locally. That seems like a dream come true...


3. Craft Shows & Farmers Markets

Has anyone ever tried to sell an item at a craft show or farmers market? I have heard great things about this, but never had any interest. Until now! 

How much does a booth cost? 
What are people looking for?
Does it have to be food? 
What should I expect? 

I went to the infamous "Eastern Market" for the first time recently and was completely thrown off by how many people and things were there. The entire place is crawling with local artists, farmers, food trucks, flowers, and sew much more! I actually spent all day looking for a cookie jar, and finally found the most adorable apple jar hiding in the corner on the very top shelf. Since it was my birthday I was able to talk them down and get a great deal. I think being able to meet people that have the same ideas and goals in mind would be very inspiring and motivating. I love people, and could talk to a wall if I had too! 


This has been such a learning experience for me. I really enjoy the challenge and can't wait to see what comes of all of this? I am definitely going to aspire at meeting these three goals in the next few months. Most importantly, my connection with people. I need all of the support and followers I can get; and with the help of my closest friends, family and community, I will show all of my love in my work.

Thank you for reading, and stick around for more exciting news to come!
XO

LMK